If you’re into Hydroponics, you’ve probably come across the term “Dutch Buckets” (sometimes called “Bato Buckets”) and been a little confused on exactly what it is and how it works.

But don’t let that confusion keep you away from exploring the hydroponic system. Despite the name and the occasional complex diagram that surfs across the internet, much like other hydroponic methods, Dutch Buckets are both easy and manageable for the everyday, average grower.
In fact, unless you’re trying to create some sort of major commercial setup, you should be able to build your own system just by reading this guide. Here’s everything you need to get started!
Table of Contents:
- What is a Dutch Bucket System?
- How Does a Dutch Bucket System Work?
- Dutch Bucket Pros and Cons
- Best Plants for a Dutch Bucket System
- Best Grow Mediums for Dutch Buckets
- Materials You’ll Need to Get Started
- How to Build Your Own Dutch Bucket System
- Frequently Asked Questions
What Exactly is a Dutch Bucket System?
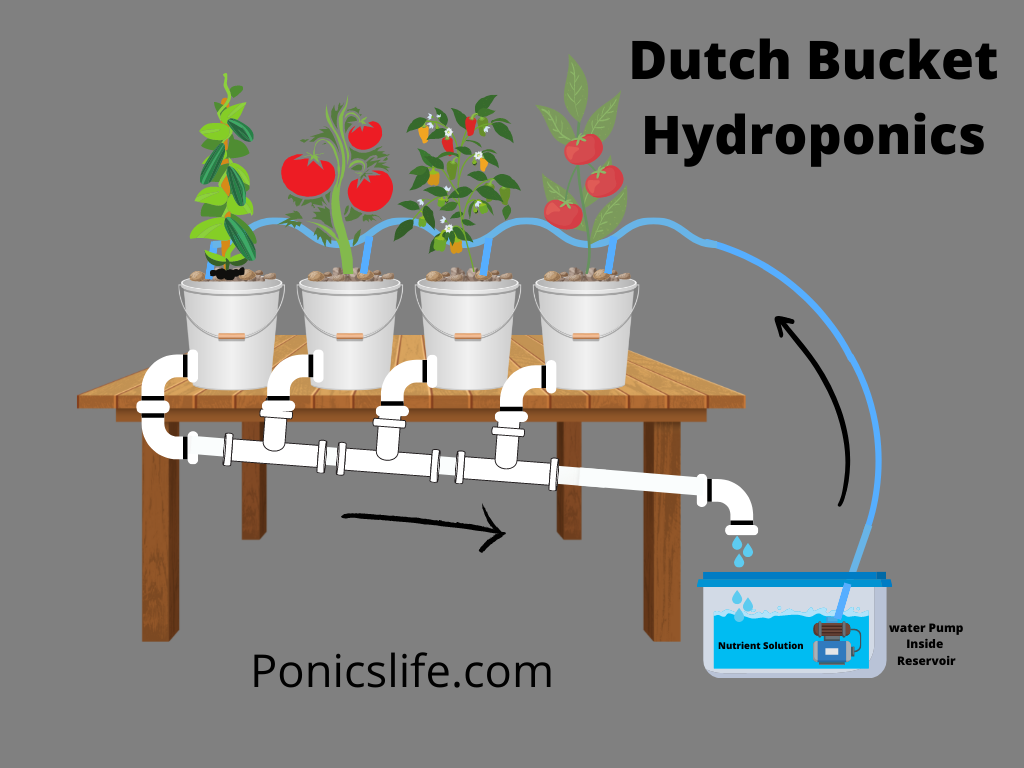
Dutch Buckets are a type of hydroponic system where two or more buckets are connected to the same drainage line and the same irrigation line. As a fully recirculating system, each bucket will be supplied with heavy “drips” of nutrient-rich water that will eventually move down through your buckets and drain back into a central reservoir.
A Dutch Bucket system ultimately works using gravity, making it an ideal system for beginner to intermediate growers who don’t quite consider themselves experts yet.
How Does a Dutch Bucket System Work?
Step 1: A nutrient solution (explore our Hydroponics Nutrients Guide to learn more) is pumped up from a central reservoir and “dripped” into a row of buckets. Each bucket generally receives the same amount of “drip.”
Step 2: Gravity pulls your nutrient solution down through your grow bucket, where your inert media absorbs the nutrient-rich water and supplies each plant with just the right amount of nutrients.

Step 3: Once the water hits the bottom of the bucket, the water goes into a drain and then flows back into your central reservoir. Once there, the process repeats itself.
Dutch Bucket Pros and Cons
As with every hydroponic system, there are pros and cons to Dutch Buckets. The good news, however, is that there’s more to like than not like and we promise, it’s definitely worth your efforts!
Dutch Bucket Pros:
- Recirculating System: The water that’s dripped into the buckets recirculates back into the main reservoir which saves water.
- Certain Plants Thrive: Vining, fruiting, and bushy plants — like cucumbers, tomatoes, and peppers — thrive in a Dutch Bucket system due to the amount of space they have.
- Saves Space Overall: Because the buckets are aligned, Dutch buckets are pretty good at saving space when compared to other hydroponic systems.
- Beginner Friendly: Dutch buckets are a fairly simple design that can be built from household materials.
- Separated Buckets: Each bucket is separate from the other making pest control and general maintenance manageable.
- Water Changing: Because each bucket is connected to a central reservoir, you only have to change/adjust water from one central location.
Dutch Bucket Cons:
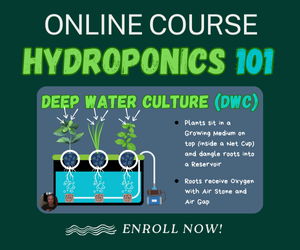
- Lots of Parts: When compared to other hydroponic methods — such as a simple Deep Water Culture System — Dutch Bucket systems have a lot of individual parts making the initial building process a little more complicated.
- Flow Rate Difficulty: As with any drip system, getting the drip/flow rate/timing can be a little tricky and is largely a trial and error process.
- Shared Reservoir: Because all of the buckets are connected to one central reservoir, the whole system will be affected if the water quality is off or disease sets in.
Best Plants for a Dutch Bucket System
Technically, you can grow anything in Dutch Buckets, but ideally, the system works best for vining, fruiting, and bushy plants. That’s because: (1) each bucket is roomy and can be spaced out, giving your plants plenty of room to grow, and (2), because you’re using a bucket, there’s plenty of room for root growth (which is typical with larger plant systems).
- Tomatoes: The most popular plant to grow in Dutch Bucket systems. Depending on the variety (especially whether it’s “determinate” or “indeterminate”), tomatoes can grow rather large and become top-heavy. Always remember to provide some sort of support!
- Cucumbers: As a vining plant, cucumbers are a great addition to your Dutch Bucket system. If you’re able to maintain their support, you should be able to have harvestable cucumbers within 5 to 6 weeks.
- Peppers: Peppers can really be grown in any system, but they do especially well in Dutch Buckets. Depending on the variety of pepper you’re growing, most will love the extra vertical and horizontal space.
- Pole Beans: As a relatively fast-growing crop (typically takes 6 to 8 weeks to harvest), climbing varieties will thrive in a Dutch Bucket system due to the amount of room each bucket provides.
- Potatoes: Because Dutch Buckets are nearly filled to the brim with a grow media (such as coco coir), potatoes are able to sit inside the bucket and mimic their natural growing conditions.
- Squash: Squash have some pretty large roots, making Dutch Buckets a perfect support system.
- Eggplants: Due to the depth of the buckets, eggplants will thrive in Dutch Buckets as they have an extremely deep root system.
Best Grow Mediums for Dutch Bucket Systems
Due to how Dutch Buckets are designed, some grow mediums will work better than others. As a general rule of thumb, stick to grow mediums that are porous, light, and absorbent. It’s also best to add some larger media — such as river rock — to the bottom of the buckets to prevent smaller media from getting into the reservoir and to allow for some inevitable “pooling” of water.
- Perlite: lightweight and porous, perlite has great absorption ability and should do pretty well in a Dutch Bucket system.
- Vermiculite: vermiculite is smaller than perlite but will still work in a Dutch Bucket system. Just remember to add some river rock at the bottom of the bucket to prevent slippage.
- Lightweight Expanded Clay Aggregate (LECA): often referred to as Hydroton – a brand of LECA — LECA is perfect for Dutch Buckets as it’s heavy enough to provide support but also lightweight.
- Coco Coir: as an all-natural and organic material, coco coir is great for Dutch Buckets. It’s the right size, holds moisture well, and allows for good aeration.
- River Rock: river rock isn’t porous, so it shouldn’t be used by itself. For best results, add some river rock to the bottom of your buckets to ensure good drainage and put a more porous grow medium — such as coco coir — on top of it.
Materials You’ll Need to Get Started
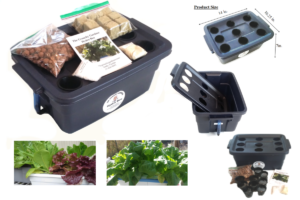
Getting started with Dutch Buckets is fairly easy and most of the items needed can be found online or at a local supply store. However, if you’re NOT interested in doing a DIY system, you can always purchase a full kit on Amazon — such as the Active Aqua Expansion Kit — that can be connected to the Active Aqua Grow Flow Ebb and Gro Controller unit.
Here’s a quick breakdown of materials if creating a DIY Dutch Bucket System:
- Buckets: each bucket should be enough to support a singular plant. Make sure that your buckets are opaque as you don’t want light getting through and causing algae growth. Additionally, make sure your buckets are “food grade” safe to prevent any leaching of plastics.
- Container: you’re going to want a central reservoir container to feed the water into your buckets. Amazon has several options — such as black and yellow storage containers — that will work great if installed/connected properly (these can also be repurposed for other hydroponic needs/systems).
- Submersible Pump: in order to pump the water from the reservoir to the buckets, you’re going to want to purchase a submersible pump that can generally pump 300 to 500 gallons per hour (GPH). **note that the GPH can vary depending on the size and placement of your system.
- Timer: getting the drip right can be difficult and is largely a trial and error process. However, getting a timer should help you adjust/experiment with your system and save you some headache. There are plenty of timers on Amazon, such as this BN-LINK Timer.
- Drip Line Tubing: although this is usually included with your submersible pump package, in the event that it’s not, you’re going to need to purchase it separately.
- Drain Tubing: PVC is typically the “tubing” of choice to drain your Dutch Buckets but it’s not the only thing you can use. But if you are using it, however, size and length are largely up to you and your particular system’s needs. Just remember that “large drainage” isn’t necessary as there shouldn’t be an extremely high flow of water moving through your buckets.
- Drip Emitters: there are plenty of drip emitters online that should do the trick (just make sure to get a size that fits your pump tubing). Or, if you’re wanting to save a little bit of money, you can always just poke a hole(s) at the end of your tubing.
- Growing Media: As stated above, get some media that’s absorbent, light, and porous — such as Hydroton or Coco Coir chips — to put inside your buckets.
- Net Pots (Optional): In most homemade Dutch Bucket designs, net pots (also called net cups) are not necessary as you can fill the whole bucket up with whatever growing media you’re using. However, if you think it would be easier to manage a smaller grow area, you can always cut a hole in the bucket lid and stick a net cup with some grow media in it.
- Structural Support System: An often skipped over consideration, your support system — whether it be a table, a board, the floor, a bench, a piece of plywood, etc. — needs to be identified before purchasing anything. You won’t be able to do anything without a structurally safe and dependable space.
How to Build Your Own Dutch Bucket System
Building a Dutch Bucket setup is a little bit more complex than some other hydroponic systems, but it’s still very doable for the everyday hobbyist. If you’re a beginner, follow these 10 easy steps to set yourself up for success.
Step 1: Find a Structurally Safe Spot
One of the most important (and often overlooked) things you need to do before purchasing/building anything, is to find a structurally safe area to build and support your system. This can be a table, a bench, a piece of plywood, or even a set of chairs (although chairs should probably be a last resort!).
Step 2: Purchase the Materials
After you’ve found a good spot to build your system, go ahead and start buying your materials. Refer to the above “Materials” section to find out exactly what you need. And remember, these systems can be as simple or as complex as you’d like. Ideally, purchase materials that are suitable for your skill level, and don’t be surprised if you have to make some returns.
Step 3: Put Your Materials in Place
Once you’ve acquired everything you need, it’s time to start putting it all together. But before you do anything, it’s probably best to lay it all out first. Put every piece that you have in its respective position and look it over to see if it makes sense. THEN, if it all looks ok and it doesn’t look like you’re missing anything, you can start measuring, cutting, etc. And remember, measure twice so you only have to cut once!
Step 4: Make the Necessary Connections
After you’ve laid everything out, confirmed that you have everything, and made the appropriate measurements/cuts, it’s time to start putting it all together. Ensure that your PVC (if you’re indeed using PVC) is securely connected/glued and that your connection areas (such as where your drainage leaves the buckets) are water tight (try using bulkhead fittings for your connection areas). Once you’ve checked your connections, take a step back and give it one last look over.
Step 5: Do a Test Run With Empty Buckets
If everything looks good, go ahead and fill your reservoir (don’t add nutrients or inert media in quite yet). Once filled, turn on your system and see if everything is running properly. Look for leaks, blockages, and general water issues. If issues are present, make the necessary adjustments.
Step 6: Add Your Grow Media
If the test run was successful, it’s time to add in your grow media. Remember to use an absorbent growing medium as this is a drip system. Additionally, if you feel it necessary, it wouldn’t hurt to do another test run. If any media is getting into the main reservoir, consider adding in a filter at the bottom of your buckets.
Step 7: Build Your Plant Support System
If you’re growing a vining plant or something that needs support, you’re going to want to build a trellis, cage, etc. around the buckets. There isn’t really one way to do this so it’s a good idea to search around on YouTube for some ideas. Most soil-based methods should work for hydroponics.
Step 8: Add Your Seeds or Seedlings
Depending on what you’re using for a grow medium, you can either sow your seeds directly into the buckets, or you can sprout your seeds somewhere else (like a grow tray) and transfer them over. To learn more, give our Seeds and Seedlings Guide a read in our Hydroponics Hobby Center.
Step 9: Add Your Nutrients
Once you’ve got some good-looking seedlings, it’s time to add in your nutrients. Most hydroponic nutrients — including General Hydroponics Flora Series, Fox Farm Liquid Nutrient Trio Formula, and AeroGarden Liquid Plant Nutrients — have good instructions on the back to get you started. Or, if you’d like to learn more from Ponics Life, try reading our Hydroponics Nutrients Guide where we cover everything in detail.
Step 10: Watch it All Grow
After you’ve built your system and added everything in, it’s time to sit back and watch it all grow! Additionally, if you have any questions pertaining to your plants or just general plant maintenance questions, as always, look through our Hydroponics Hobby Center to see if we can help. If you don’t see what you’re looking for, send us a message via our contact form and let us know what we can add.
Dutch Bucket FAQs
1. How complicated is it to build?
As a system by itself, with all the bells and whistles, Dutch Buckets can be somewhat complicated to set up/build, but I wouldn’t call it “hard” or “difficult.” Yes, when compared to other hydroponic systems — such as a simple DWC bucket or a media bed — it has more moving parts, but as explained above, it is completely doable and manageable for the everyday hobbyist.
2. Is It expensive to build?
The exact setup cost of a Dutch Bucket system is really up to you, the grower. For obvious reasons, the more buckets you add the more expensive the system becomes. If you’re worried about costs, it’s probably best to build a smaller system with local materials found around town (or online of course). You can always expand your system later on.
3. How much water should fill each bucket?
Because this is a Dutch Bucket system and not a Recirculating Deep Water Culture system, there isn’t a need to have standing water. However, it is common for some systems — especially homemade ones — to have a small pool of water build up at the bottom of your buckets (hence the need to place river rock at the bottom of your buckets).
4. How frequently should your plants be watered?
The timing/flow rate of the drip is largely a trial and error process. However, as with any drip system, you really want your plants to have a relatively steady and consistent amount of dripping for each bucket. If you’re just starting out, use a 300 to 500-gallon per hour (GPH) pump and adjust accordingly as you experiment.
5. Can a Dutch Bucket system be used for aquaponic systems?
Yes, there’s no reason why you can’t use a Dutch Bucket system for an aquaponics setup and there are loads of people that have made it work. However, it does require some additional customization and expertise due to its complexity (as fish are involved). Before attempting anything, make sure you have a good understanding of aquaponics and everything that it takes to run an effective aquaponic system. After all, Dutch Bucket aquaponics system is probably something that would be best suited for more experienced aquaponic growers.
6. Do plants need to be supported in a Dutch Bucket System?
Yes, as explained above, Dutch Bucket systems are great for bushy, vining, and fruiting plants. Therefore, if a “bigger plant” is what you’re intending to grow, you’re going to want some sort of support system — such as a cage, trellis, string, stake, etc. — to keep your plants upright and supported. If you’re growing something small — such as hydroponic lettuce — then a support system is not needed.
7. What’s the difference between a Bato Bucket and a Dutch Bucket?
There is no difference between a Bato Bucket and a Dutch Bucket, and by all accounts, they are the same thing. In researching, it seems that the term “Dutch Bucket” came from a Dutch company growing roses in 1989, whereas the term “Bato Buckets” is still somewhat of a mystery.
8. Do I need to oxygenate my reservoir?
While some people do oxygenate their reservoir, you don’t have to. Because the buckets are not filled up with water, the small spaces in between your grow media should provide plenty of oxygen. However, if you’d like to oxygenate your reservoir anyway, it certainly wouldn’t hurt anything. The more oxygen the better.
9. Does a Dutch Bucket system need to recirculate?
No, a Dutch Bucket system does not need to recirculate and can easily be a non-recirculating system. However, in the interest of the environment, it’s best to have the system hooked up to drainage and recirculated back to a central reservoir. Yes, there are some advantages in not recirculating (such as better nutrients management), but saving water far outweighs those benefits.