If there’s one thing that every hydroponic and aquaponic hobbyist should know, it’s how to start and grow a plant from a simple seed!

Seeds — those tiny little round embryos of creation — are some of the most remarkable features in our world! Not only are they the catalyst for all life on earth, but they support the very survival of our entire planet, spreading new life via land, air, and sea by whatever means possible.
And while the concept of seeds may seem pretty straightforward — plant, grow, harvest — it’s a little more complicated than that, especially when it comes to hydroponics and aquaponics.
So without further ado, here’s your ultimate guide on how to start, germinate, transplant, and collect seeds and seedlings in hydroponic and aquaponic systems.
How Does the Germination Process Work?
First and foremost, remember that seeds are living entities. They contain an embryo and food reserves and lie dormant as they await the perfect combination of temperature and moisture to “wake up” and reveal themselves.
Here’s a full breakdown of how that process works:
Step 1: Inhibition — The once hard seed is exposed to moisture and starts to soften and swell on the outside. As more and more moisture soaks into the seed, it starts to become soft, wrinkly, and squishy.
Step 2: The Interim Phase — After being exposed to moisture, the seed starts to internally activate itself, where cells respire and then start to metabolize its “stores of food” while it makes proteins. This is also called the “lag phase.”

Step 3: The Emergence of Roots — This is where cells start to divide and elongate themselves, where eventually, the primary root (also called a radicle) exposes itself, growing downward and anchoring itself to whatever it’s sitting in.
Seedling Development in Hydroponics and Aquaponics
Once the primary root (aka the radicle) has emerged from the seed, anchored itself, and absorbed some water, a small shoot will emerge from the other end of the seed and start growing upwards towards whatever lights available. And depending on the type of plant, it will show itself as having either one leaf or two leaves.
One-seed Leaves (Monocots): A monocot plant — such as asparagus, sweet corn, and onions — will emerge from your seed with only one leaf, called a “cotyledon.” When monocots grow up, you’ll notice that their leave’s veins run parallel to each other (usually appears narrow and grass-like).
Two-seed Leaves (Dicots): A dicot plant — such as basil, cauliflower, and cilantro — will emerge from your seed with two leaves (aka cotyledons) instead of one. When dicots grow up, their leave’s veins will branch outward like a feather.
Seed vs Seedling
A common question that comes up in the hydroponics and aquaponics community is “what’s the difference between a seed and a seedling” — and because the field of hydroponics and aquaponics uses the word “seedling” so often, it’s important to understand the difference.
In the simplest of terms, a seed is just a seed until it sprouts and becomes a seedling (aka an infant plant). Once sprouted, it’ll maintain its “seedling” status until it’s recognizably grown and contains a few “true leaves” which resemble the leaves of a mature plant.
Choosing Your Seeds
Choosing a seed to grow may seem pretty straightforward, but there’s a little more to it than just picking out what you “want” to grow and eat. Because seeds are so unique in their composition, they have to meet certain conditions to “activate” themselves and grow.
Here are three things you need to take into consideration:
1. How long does it take?
Unfortunately, not all seeds germinate at the same time. Some seeds, like basil and cauliflower, take about a week, while other seeds, such as asparagus, take a couple of months. So before you pick a plant, just make sure you understand the germination rate first. Otherwise, you’ll be spending a lot of time staring at your plant in frustration or googling what’s wrong.
2. What temperature does it need?
Temperature is a big factor when it comes to germination. While most seeds will germinate between 68 and 86 F, some have very specific temperature needs and won’t leave their state of dormancy unless certain temperatures are met. Ideally, you want to do your research and pick a seed that’s able to germinate in your particular climate.
3. How many seeds should I use?
Depending on where you purchased or acquired your seeds, the quality is going to vary. As a general rule of thumb, plant three seeds for every one plant you intend to grow just in case you have some bad ones.
With three seeds, you should have a high success rate and you can always remove the other sprouts if more than one pops up.
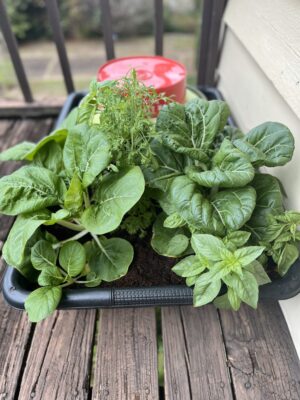
5 Ways to Start Your Seeds Without Soil
As we’ve discussed quite frequently here at Ponics Life, plants DON’T NEED SOIL to do anything. If given water, light, and the right growing conditions, they’ll do just fine without it and even thrive, especially at the beginning of their life!
So, if you’re not going to use soil and you want to officially embrace the Ponics Life, you have a few options to get started:
1. Buy a Propagation Tray
The easiest way to start seeds is to simply buy a propagation tray. They’re fairly inexpensive and they include everything you need to get started (including directions). Here are some popular ones on the market right now.
- MIXC Seedling Trays (with humidity dome)
- NEWKITS Starter Tray Kit (with humidity dome)
- SOLIGT Seed Starter Kit with Grow Light
2. Build a Propagation Tray
If you’re up for a fun project, you can always build a propagation tray yourself. And while there are several ways to do this using household materials — eggshells, empty carton boxes, toilet paper rolls, paper mache, cereal boxes, etc. — we recommend using a simple egg carton. Here’s what you need to do:
- Fill a biodegradable egg tray with growing media such fine pith coco coir.
- Sow your seeds and place each seed about a 1/2 centimeter deep and then cover it with whatever growing media you’re using. There’s no need to compact it down.
- Place your tray on top of a container lid (to keep water from draining away) and place the tray in a slightly shaded area.
- Water your seeds so that the media is moist but not soaking wet. Keep it moist as it starts to sprout.
- Once it sprouts, move the tray to a brighter area (such as a windowsill) and then keep giving it more and more sunlight as the leaves start to appear.
- Keep your seedlings in the tray for about two weeks to ensure adequate and healthy root growth.
- Once adequate root growth is established and your plants have 3 to 4 true leaves, remove the seedlings from their plugs and transplant them into your aquaponic or hydroponic unit.
3. Start Seeds from a Paper Towel
Another great way to start seeds is to use a paper towel. It’s simple, easy, and effective and requires very little effort on your part (at least initially). Here’s everything you need to know.
- Wet half of a paper towel and place your seeds on the wet side
- Fold your paper towel in half so that the seeds are between the two halves
- Place your paper towel in a small Tupperware container (optional)
- Or, take a plastic zip lock bag, blow some air into it, and then place and seal your paper towel inside
- Place the bag in a dark place away from sunlight and your seeds should sprout in about 5 to 7 days
The drawback to this method, of course, is that once your seeds have sprouted, you’ll need to eventually transplant them to some sort of growing medium. Because plant roots need something to anchor into, a paper towel can only be used for so long.
4. Start Them in a Growing Media
Another effective way to start seeds is to simply place them in the same media that you intend to grow them in. So whichever system you’re using — deep water culture, media bed, NFT — it’s perfectly acceptable to grow them here, but just be mindful that:
- The seeds are going to need moisture somehow (easiest to pull off in a media bed)
- If your water is already nutrient heavy, it might be too much for the sprouting seeds and seedlings
- If your growing media is too loose or bulky, then your seeds might not get the darkness that they need to sprout and fungus might grow.
- Starting seeds directly in your unit might not give you the control you want. When growing in trays, it’s easier to monitor and you can selectively pick which seedlings you want to transplant.
5. Construct a Plant Nursery
If you’re wanting to expand your operation, then you’re probably going to want to build a small plant nursery to keep things running smoothly. This will give you the ability to (1) select the best seedlings to use in your system, (2) quickly replenish your supply, and (3) time your overall production.
Here’s how to construct your own plant nursery:
- Build a large wooden table or box with vertical lips on each side
- Cover the table with a polyethylene liner and secure it in place
- Place polystyrene or homemade propagation trays into the nursery bed and fill each space with an inert grow media
- Place seeds into the propagation trays
- Pump water into the grow bed for about a half-hour each day (manually or with an electric pump and timer)
- Allow the water to drain into a tank below the table.
How to Transplant Your Seedlings
Once your seedlings have a few true leaves on them and resemble a healthy, vibrant-looking young plant, it’s time to take them from your germination tray and place them in your aquaponics or hydroponic unit.
And while transplanting seedlings in hydroponics and aquaponics may sound simple, it’s not as easy as it sounds, and depending on the system you’re using, there are several things you need to do and consider before switching them over:
1. Media Bed Transplanting
- Push aside the grow media and create a hole that’s big enough for your seedling
- Place your plant 5 to 7 centimeters down
- Place your plant when the media bed flooding is at its highest point (you want the roots partially submerged)
- Don’t put your plant too far into the grow media. If your plant’s stems get wet during the flooding it could potentially lead to collar rot.
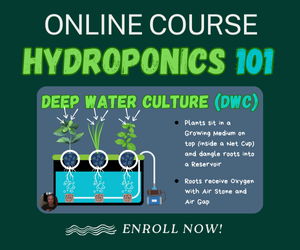
2. Deep Water Culture (DWC) Transplanting
- Place your seedling into a net cup and hold it in place
- Insert a growing medium around the plant
- Ensure that the bottom of the net cup is just barely touching the water level
3. Nutrient Film Technique (NFT) Transplanting
- Take a net cup and hold your plant inside it at the right height
- Insert grow media around the plant
- Ensure that the stem of the plant is water free and that the roots are barely touching the water
Three Rules of Transplanting
- You should avoid transferring soil-grown seedlings into hydroponic systems. Not only does soil carry pathogens that are harmful to your aquaponic unit, but the washing process to get rid of the soil can be damaging to the plant’s roots.
- Try to transfer at night to avoid shock. Because plant roots are extremely sensitive to sunlight, it’s safest to transfer your seedlings at night. Additionally, as young plant leaves experience water stress, transferring at night will ease some of these concerns.
- If possible, transfer your plants at dusk. This will give them a night to acclimatize to their new environment before hitting that morning sun.
How Seed Collection Works
If you’re growing plants in hydroponics and aquaponics, you might as well learn how to collect your own seeds. After all, if the very plants you’re growing are providing them anyway, it doesn’t make sense to buy them. Here are a few general rules to follow:
- Only use seeds from mature plants; seeds from young plants won’t work
- Hybrid plants are usually sterile so seed collection should probably be avoided
- Maintain healthy and genetically diverse plants by collecting seeds from different plants
Additionally, there are two major categories of seeds that you need to be aware of: dry seed pods and wet seed pods. Dry seeds — such as basil, broccoli, and lettuce — can be harvested throughout the growing cycle while wet seeds — such as peppers, tomatoes, and cucumbers — can only be harvested when the fruit appears.
Collecting Dry Seed Pods
- Harvest the entire stem of the plant and place it in a paper bag
- Store the bag and the plant in a cool, dark place for 3 to 5 days
- Periodically shake the bag while it’s stored
- Open the bad after 3 to 5 days and give it one last shake while the stem is still inside
- Remove the debris (stems and leaves) and keep the seeds (can use a sieve to filter)
- Gather your seeds and put them in their own bag for storage
Collecting Wet Seed Pods
- Physically remove the fruit from the plant
- Slice open the fruit with a knife and scoop the seeds out with a spoon
- Place the seeds on a paper towel or use a sieve to start separating them
- Use a cloth and some water to wash the gel off
- Dry the seeds and put them in some shade (flip them occasionally)
- Store them in a paper bag once fully dry
Suggestions for Storing Your Seeds
- Store seeds in some sort of paper bag in a cool, dark, and dry place
- Ideally, store in an area with limited amounts of moisture
- Small refrigerators work well for seed storage
- Consider using an airtight container if available to prevent moisture and fungus
- Keep debris and soil out of the bag to reduce the risk of premature germination, disease, and mold
- Write the date and type of plant on each bag
- Sow and use the seeds within two to three years
Best Hydroponic and Aquaponic Seeds
If you’re not going to locally source your seeds or collect them from your plants, there are plenty of places to buy them online.
- Amazon has a wide variety of vegetable seeds you can purchase from reputable companies.
- True Leaf Market has thousands of seeds available and even has hydroponic grow kits for sale.
- The Living Seed Company has high reviews and also has a wide selection of seeds.
Let’s Wrap It All Up
So there you have it, Your Ultimate Guide to Seeds and Seedlings in Hydroponics and Aquaponics. In summary, just remember that there’s a lot more to seeds than meets the eye. Not only are they the very foundation of life, but they keep the wheels turning! In essence, they really are the building blocks of our world and you need to understand them as you build up your skills!
If you still have some questions or want something added to this guide, please reach out to us and let us know! Otherwise, feel free to explore Ponics Life for even more hydroponic and aquaponic information!