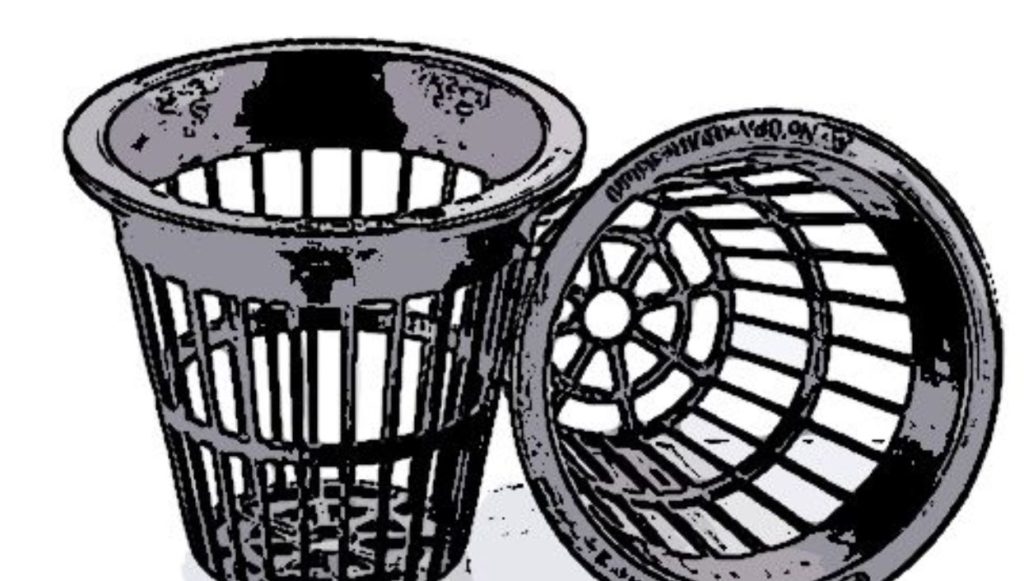
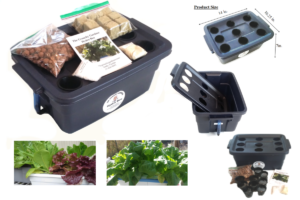
“Net pots” are miniature plastic pots that are used in hydroponics to hold, contain, and anchor a plant’s roots to your hydroponic system. Also called “net cups,” they are round or square in appearance with a distinct “net” shape to them, which allows water and air to flow through your plant’s roots simultaneously. Not only does this promote a healthier plant, but it makes the entire process easier and more efficient.

What Are Net Pots Used For?
As stated above, in hydroponics and aquaponics, net pots are essentially used as small plant-root containers, where the pot itself anchors the plant to your system. And because of their unique shape and framework, your vegetable’s roots (regardless of what you grow) are allowed to grow freely at their own discretion, exposing them to more oxygen and promoting healthy, more vibrant fruits and vegetables.
How Net Pots Work
Net pots work through aeration and drainage, allowing oxygen, water, and nutrients to flow in and out of your roots at the same time. Due to their porous design, they allow each plant to soak in exactly what it needs to thrive, fully optimizing root growth and plant development. Here’s a detailed explanation of how that works:
1. Holes and Oxygen:
In traditional farming (where soil is used) roots obtain oxygen through tiny air pockets within the soil. In a hydroponic system, however, soil is replaced by other means — such as rockwool, perlite, and clay pebbles — and oxygen is obtained from air stones (that sit in the water) or open-root air exposure (think of roots dangling in the air).
Net pots, because they are webbed and contain holes on their sides and bottom, give roots a chance to be fully exposed to oxygen, something that wouldn’t be possible if grown in the ground.
2. Holes and Roots:
If your roots were grown in soil, they would attempt to take the quickest path to the most amount of nutrients and oxygen (similar to how a river tries to find an ocean). In a soilless system, however, they’re already exposed to oxygen and nutrients, giving them room to grow naturally in any manner that’s suitable to their needs.
When you use net pots, you’re giving your plants freedom, allowing them to roam in and out of your net pot holes with ease. This alleviates the need for your plant’s roots to “hunt” certain conditions because they’re given everything they need right where they sit.
3. The Roots as an Anchor:
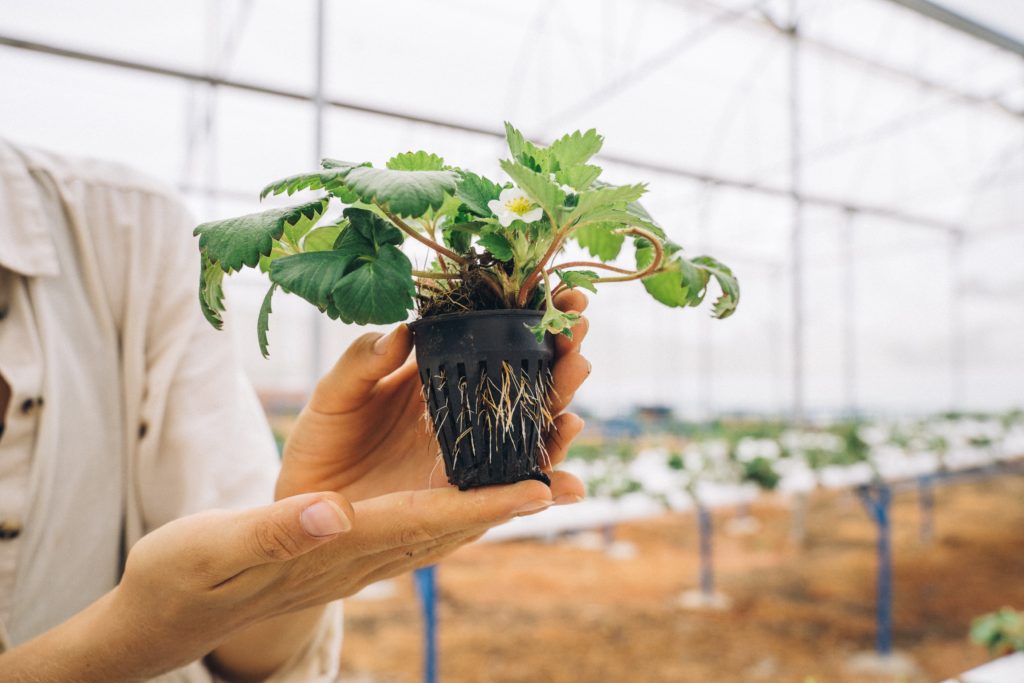
The last and most important aspect of net pots is that they “anchor” your plant to your physical system. Basically, the plant (whatever you have chosen to grow) sits within the net pot — the budding part of the plant grows upward and the roots grow downward. Thus, as your plant grows bigger and bigger, it’s balanced and secured.

How to Use Net Pots
Net pots are fairly simple and you should be able to get the gist just by looking at them. But if you’re new to hydroponics and the concept is still a little fuzzy, you might want to take some time to familiarize yourself with the process.
Step 1: Pick what fruit or vegetable you want to grow
Assuming that you know what type of hydroponic system you’re going to use, your first step is to pick out a fruit or vegetable to grow. For beginners, just stick to something easy, like tomatoes or lettuce.
Step 2: Decide what size net pot you need
Your next step is to pick a size. Most net pots are between 2 and 6 inches. The smaller ones are best for lightweight vegetables, your medium ones are for middle-weight vegetables, and your large ones are for heavier plants that need a stronger anchor. Some common sizes include:
- 2-inch net pots: small, lightweight vegetables (broccoli, peppers, basil, etc.)
- 3-inch net pots: small lightweight vegetables (orchid, cilantro, etc.)
- 3.75-inch net pots: medium-weight vegetables (tomatoes, collards, etc.)
- 5-inch net pots: medium weight vegetables (strawberries, kale, etc.)
- 6-inch net pots: large, heavy vegetables (cabbage, cauliflower, etc.)
Step 3: Purchase your net pots
There are several options and brands when it comes to net pots. If you’re buying at a local store, make sure to give it a good look over (lip size, overall size, durability). If you’re buying online, make sure to do your homework and read some reviews. After all, trying to return something is always a hassle.
Here are some recommended brands:
- Cz Garden
- Viagrow
- Growneer
- xGarden
- Zaelon
- Awpeye Garden
Step 4: Add Your Plants to Your Net Pots
Adding your pots to your system isn’t all that complicated but it can be a little intimidating at first. To get started, all you need to do is follow three simple steps:
- Step 1: Take your plant and put it inside the net cup. If your plant is really small, it may need to be put on top of some clay pellets (or whatever growing medium you’re using) to prop it up a little. You want the top portion of your plant over the top of the net cup.
- Step 2: Start putting your grow medium (clay pellets, lava rock, etc.) around the plant. Make adjustments as necessary and make sure your plant is secure and anchored to the net pot. And remember, depending on what type of system your using (DWC, raft, etc.), you want your roots to be exposed to the water and nutrients. Double check that your roots are reaching the water, otherwise, your plant won’t grow.
- Step 3: Look around your plant and make sure that light isn’t penetrating through your medium. If any light gets through, it’ll cause algae to grow, which isn’t something you want.
If you still have questions about this process, give this instructional video a try. It’ll take you through the process and cover propagation methods as well.
The Best Growing Medium for Net Pots
If you’re going to use a growing medium in your net pots, then you really only need to meet one requirement – the media can’t be smaller than the net pot holes. If it’s smaller than your holes, you’re growing medium will enter your water and foul up your system. Here’s a quick list of growing media options:
1. No Medium
The great thing about net pots is that they don’t need a growing medium. But, if you’re not going to use a grow medium, then make sure your plant is big enough so that it doesn’t fall through. It also wouldn’t hurt to buy some pots with lids on them (otherwise, light will penetrate down to your roots).
2. Rockwool
Rockwool cubes are a great option for your pots. They’re sturdy, durable, and do well in hydroponics and aquaponics. However, because of their shape, you’re probably going to want to surround the cube with some pellets so that light doesn’t get through (it’ll also help secure it).
3. Lava Rock
Lava rock comes in a variety of shapes and sizes, but for purposes of using them in net pots, it’s probably best to use 3/8 inch rocks. 3/8 inch lava rocks should be big enough and won’t fall through the holes.
4. Growstones
Growstones are pH neutral and will work well within your net pots. They provide strong aeration and support and because of their irregular shape, plants latch on to them really well.
5. Clay Pebbles (Hydroton)
Clay pebbles are an excellent option to use in your hydroponic or aquaponic net pots. Just like growstones, clay pebbles give plenty of support and won’t fall through your holes. And, as the most common grow media in hydroponics, they’re also durable and strong, which allows for plenty of reuse.
6. Coco Coir
Coco coir comes in several different forms but only the larger options should be used in your net pots. Avoid using coco peat and coco pith (as they are very finely ground) and stick with a larger option that won’t break down and slip into your system.
7. Perlite
Perlite does pretty well in net cups, but only if you’re able to line the cups with some cheesecloth or fabric. Because perlite is so small, it can and will slip through the holes and into your system without a barrier. Your other option, of course, would be to just use cloth pots.
8. Vermiculite
Just like perlite, vermiculite can technically be used in your net pots and will work, but it has to be lined with something. If it’s not lined with cheesecloth or something else, it will get into your system and possibly jam your pumps. If you’re a beginner, it’s probably best to use another grow medium with your net pots.
What Else Should I Avoid?
Just like soil, try to avoid anything that is considered “fine” in nature and can slip through your net’s holes. Mediums such as perlite, vermiculite, and sand should be avoided (if not using a cloth barrier) and will find their way into your system if you use them. And once they get into your system, it can be very difficult to clean it all out and can easily clog your pump.
How to Make Your Own Net Pots
Net pots are pretty inexpensive, but if you don’t feel like ordering some or going to the store to buy some, you can always use some materials you have laying around the house. Here’s how to make your own net pots.
Step 1: Find a Container
Your first step is to find some sort of small container that’s the right size. And depending on what you have around the house, this can really be anything. Water bottles, solo cups, yogurt cups, plastic cups, and Keurig pods have all been successfully used as nep pot alternatives.
Step 2: Cut Your Holes
Your next step is to cut holes in your container. There are a few ways to do this — hole punch, scissors, utility knife — but one of the more popular ways is to use a soldering iron. Simply heat up the iron and then melt holes on the bottom and side.
Step 3: Test It Out
Finally, after you’ve successfully poked holes around your container, all that’s left is to test it out. Put your plant into the cup and see what works and what doesn’t work. If one of the cups works better than the rest of the ones you made, then go with that design from here on out.
If you want some more instruction on this, here’s a homemade instructional video from a grower.
Frequently Asked Questions
1. Are Net Pots Reusable?
The best part about net pots is that they are indeed reusable. Feel free to use them as much and as often as you can. When you’ve completed a harvest (regardless of plant), just give your pots a quick inspection and cleaning and you should be good to go.
2. Do They Come in Different Shapes?
Net pots come in a variety of shapes but typically, you’ll see them as round or square. And while the square ones do have a little more room, at the end of the day, it really comes down to personal preference. Try both and see which one you like.
3. Can I Put Soil in My Net Pots?
No, the point of net pots (and hydroponics and aquaponics in general) is to avoid having to use soil. Additionally, because soil is so loose, it will easily fall through the holes (aka netting) within your net pot and clog up your system. As most hydroponic systems are designed as “soilless,” it wouldn’t make sense to incorporate it here.
4. What Other Growing Mediums Should I Avoid?
Just like soil, try to avoid anything that is considered “fine” in substance and can slip through the holes of the pot. Therefore, it’s probably best to avoid sand and perlite as these are very small grow mediums that will find their way through the holes and into your system.
5. Can Net Pots be Used for Aquaponics?
Yes, net pots can be used in both hydroponics and aquaponics. Because both systems typically share growing methods, they are great for both systems and will work and function the same.