Clay pellets, growstones, rice hulls, perlite… today’s hydroponic gardener has a lot of options when it comes to choosing a growing medium. But nothing quite beats coco coir for fantastic air-to-water ratio, fungus protection, and highly sustainable production.

There are so many good reasons that coco coir is rising in popularity amongst the gardening community, not least of which is that it’s a former waste product with a wide range of properties that can benefit your garden. Whether you’re just getting started in hydroponics or are a seasoned expert, experimenting to find the best medium, coco coir is a great choice for strong, healthy plant roots and minimizing our impact on the planet. Find out why below.
What is Coco Coir?
Coco coir (or coconut coir) is a popular gardening growing medium and soil amendment made from coconut byproducts.
Where Coco Coir Comes From
Inside a coconut, there are six main layers. A cross-section of a coconut looks a lot like a cross-section of the earth. From the outside in, every coconut has:
- An outer coat
- A thick, fibrous layer (or husk) of coir
- The hard brown shell we’re all familiar with when buying whole coconuts to eat
- A seed coat
- White flesh, the part of the coconut we love to eat
- Coconut milk
The husk is there to protect the coconut. In tropical regions where coconuts grow natively, ripe coconuts can often fall into the ocean water. The husk traps air to help the coconut float and protects the inner seed from being damaged by the sun, saltwater, or fungus. When the seed is ready to germinate, the husk becomes an ideal growing medium for the new tree.
When we use coconut coir in our gardens, it offers the same benefits to our plants as it does the coconut! Just as it supports the healthy germination and growth of a coconut seed, it will provide your plants with a well-aerated and fungus-free growing medium.
The husk can be made up of two types of fiber: brown and white. White coir fibers are flexible but much weaker than the brown ones and come from unripe coconuts. Brown coir fibers are strong and inflexible and come from mature, ripe coconuts. The majority of what we use in gardening is brown coir.
How Coco Coir is Made
Coco coir needs to be processed before being used in your garden. To extract it from the raw coconut for your use, manufacturers:

- Soak the husks to loosen and separate the coir from the coconut
- Dry the husks for over a year
- Organize them into bales
- Chop the bales into different textures, ranging from course chips to ground coir
How Coco Coir is Used
Coconut coir was once sent to landfills, but we’ve since discovered many other great uses. Generally speaking, it can be used as a sustainable replacement anywhere you’d use peat moss.
The many uses of coco coir in the world of gardening include:
- Hanging planter baskets
- Worm farms and vermicomposting
- Soil mixtures and amendments
- Seed starting
- Soil toppers or bases in plant containers to prevent evaporation and excess drainage
- As poles for climbing plants
- Biodegradable pots
- Mulch
- and, of course, as a medium for hydroponic gardening!
You can also find coco coir in a range of useful products, including:
- Doormats
- Mattresses
- Car and airplane seats
- Rope
- Yarn
- Brushes
Pros and Cons of Using Coco Coir
Coconut coir is a fantastic and sustainable option. It comes with a wide range of benefits when compared to its popular alternative peat moss, as well as traditional soil planting. Of course, it also comes with downsides to consider.
The Benefits of Using Coco Coir
Coco Coir is a popular growing medium because it is:
- Renewable: because it’s made from what would otherwise be a waste product from coconuts, coco coir is a significantly more sustainable option than alternatives like peat moss. Coconut crops can be grown annually, making them a readily renewable resource that’s kind to the planet.
- Moisture Retentive: coco coir can absorb ten times its weight in water, making it one of the most water retentive growing mediums available. Using it will ensure your plant roots stay well hydrated.
- A Healthy Environment for Roots: coco coir creates a great environment for strong, healthy root growth by providing plants with plenty of growing medium to work through.
- Antifungal: coco coir is naturally antifungal, and will protect your plant roots from pythium, phytophthora, and other fungal infections.
- Slowly Deteriorating: coco coir gradually deteriorates over time, creating air pockets that help oxygenate plant roots and prevent root rot.
- pH Neutral: coco coir is pH neutral, meaning it is neither acidic nor alkaline. This makes it the ideal home for a wider range of plants, and can be easily amended for plants that prefer more alkaline soil.
- Uninviting to Insects: many common garden pests find coconut coir uninviting, so it can act as a barrier defense for your plants.
- Easy to Handle: compared to peat moss, coconut coir acts like a sponge, making it easier to hydrate and work within your garden.
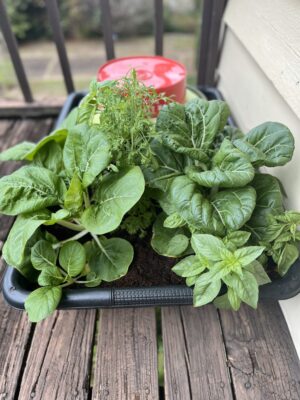
- A Good Intro to Hydroponics: coco coir can make a good transition for those new to hydroponics but familiar with traditional soil gardening because it looks and feels like soil. Using coconut coir, your hydroponic setup can look and act surprisingly similar to a soil-based garden. If you’d like to get started in hydroponics without investing in a complex, purpose-built system, it may just be the answer.
The Downsides of Using Coco Coir
Of course, like any growing medium, coco coir comes with some downsides. It is:
- Inert: unlike soil, coco coir contains no nutrients. When growing in coco coir, it’s up to you to supply your plants with the nutrients they need from day one. It’s is also known to hold on to calcium, magnesium, and iron more than other nutrients, so you may need to boost these for your plants to access them.
- Initially Dry: the most affordable option for coco coir is to purchase it as a dry, compressed brick that you’ll need to rehydrate before you get started. Though it adds a step to your growing process, it makes it much cheaper to ship.
- Expensive as a Mix: you can avoid the hassle of rehydrating a compressed brick by purchasing a ready-made mix, though these will be more expensive.
Some coco coir is also:
- Soaked in Salt Water: some (but not all) manufacturers soak the coco coir in saltwater as part of the process. If this is the case, it’s important to find out if the manufacturer also rinsed it with fresh water. If not, you will need to rinse it yourself.
- Chemically Treated: some (but not all) manufacturers also treat coco coir bales with chemicals to prevent pathogens. This is something you’ll need to take into account when adding it to your garden to ensure it does not interfere with plant growth.
How to Choose the Right Coco Coir for Your Garden
More and more coconut coir products are on the market every day, so how do you choose which one is right for your garden? It starts with understanding the three types of coco coir, and the best practices manufacturers should follow to ensure a quality product.
The Three Types of Coco Coir
There are three main types of coconut coir, differentiated by how they are processed. For the best results, you’ll want to use a mixture of all three types to best suit your growing needs. Many companies sell ready-made mixtures to take the guesswork out of this for you.
- Coco Pith or Peat: this is a fine, rich brown material that looks a lot like peat moss or finely ground coconut. To prevent it from releasing harmful salts, it must be aged properly (for at least four months) before use. Using coco pith alone can drown your plant roots because of how absorbent it is.
- Coco Fiber: these stringy bundles are often used for hanging planter liners. Coco fiber is made of cellulose, a tough and unabsorbent medium that helps create plenty of air pockets for good oxygen circulation. They do break down quickly though, which can decrease the air pockets available to your plant roots.
- Coco Chips: these are the chunkiest form of coco coir and act like a natural, biodegradable clay pellet. They find a happy medium between coco pith and coco fiber, both absorbing water and creating plenty of air pockets.
What to Look for to Ensure You Buy a Quality Product
When buying coco coir, there are important things to look out for to ensure you are getting a high-quality product that will support healthy growth for your plants.
You should look for coconut coir suppliers that maintain good practices when harvesting, preparing and processing the coir to avoid pathogens and ensure the correct amount of aging. When choosing a supplier, find out if they:
- Prevent pathogens
- Control the coconut coir’s aging
- Rinse the coir in freshwater to remove salts
- Provide the right blend of pith, fiber, and chips
- Package and store the coir well
How to Assess Coconut Coir for Hydroponic Gardening
When choosing coconut coir to use as a growing medium in your hydroponic or aquaponic garden, there are a few extra things you’ll want to look out for to ensure the best possible results. Both the pH and the electrical conductivity of the coconut coir you use will have an impact on your hydroponic garden.
To do a home assessment for use in your hydroponic garden, you will need:
- The dehydrated block of coco coir you want to assess
- Reverse osmosis demineralized water
- Two bowls
- A strainer
- A pH meter or test strips
- An EC meter
To conduct your test:
- Rehydrate the block of coco coir.
- Take pinches of coir from different places around the block. Gather about half a cup in total.
- Put your sample in a bowl.
- Add six ounces of reverse osmosis demineralized water.
- Let it soak for a few hours.
- Stir the mixture.
- Measure the pH of the mixture using your pH meter or strips.
- Strain the water from the coco coir into your second bowl.
- Measure the EC of the water using your EC meter.
- Measure the pH of the water using your pH meter or strips.
For the best results in your hydroponic garden, your coconut coir should sit between:
- An EC of 1.0 to 1.3
- A pH of 5.3 to 6.2
Our Top Picks
In addition to following the good practices listed above, experienced hydroponic gardeners recommend these brands:
- Urban Worm Coco Coir, ideal as a growing medium for hydroponics, bedding for worm farms, and as a mixture in homemade potting mix. It’s available on Amazon and elsewhere online.
- CANNA Coco, a trusted brand with both mixes and compressed brick options.
- FoxFarm Coco Loco, a brand known for quality across their entire range.
How to Use Coco Coir in Your Hydroponic Garden
To use coco coir as the growing medium for your hydroponic garden, you will need to:
- Hydrate it: if you’re starting from a compressed brick, follow the instructions on the package to rehydrate your coco coir.
- Wash it: if it does not come pre-rinsed from the manufacturer, you will need to wash it to remove the high levels of salt. You should do this by using pH-neutral water and rinsing it until the water runs clear.
- Add aeration: your coir may be clumped together when you first rehydrate and rinse it. Break up these clumps with your hands to add plenty of air pockets. You can also add perlite to help with this.
- Add nutrients: because coconut coir is inert, it’s up to you to provide your plants with the nutrients they need. Since your plants’ needs when growing in this medium will be different from other hydroponic setups, look for a hydroponic nutrient supplement specifically designed for use with coco-coir. Specifically, a supplement with calcium, magnesium, and nitrogen.
- Add beneficial bacteria: coconut coir is a great environment for beneficial bacteria to breed, but you’ll need to add them first. You can do this through supplements, organic nutrients, and organic fertilizers such as worm castings.
Now your coco coir is ready to provide a fantastic growing medium for all your hydroponic plants!
Get More Hydroponics Tips at Ponics Life
Now that your plants are happy and healthy in their new coco home, what’s next? Keep your garden knowledge growing by joining the Ponics Life Club, where you’ll receive alerts every time they release a new guide, as well as access to exclusive webinars and products to help your hydroponic garden thrive.
Join the Ponics Life Club and read more on our blog!