Hydroponic drip systems are among the most efficient and adaptable methods for growing plants in a soilless environment, and understanding the basics of drip systems will help you take your hydroponic garden to the next level. In this guide, we’ll break down what a drip system is, its advantages and disadvantages, the key components, variations of the system, and answer some frequently asked questions.
If you’d like to learn more about Drip Systems and hydroponics, explore the Hydroponics Hobby Center, or take our online course Hydronics 101: Learn, Design, and Build Your Own System, where I demonstrate the Drip System along with other techniques. But anywho, let’s get back to the topic at hand!
What’s a Drip System?
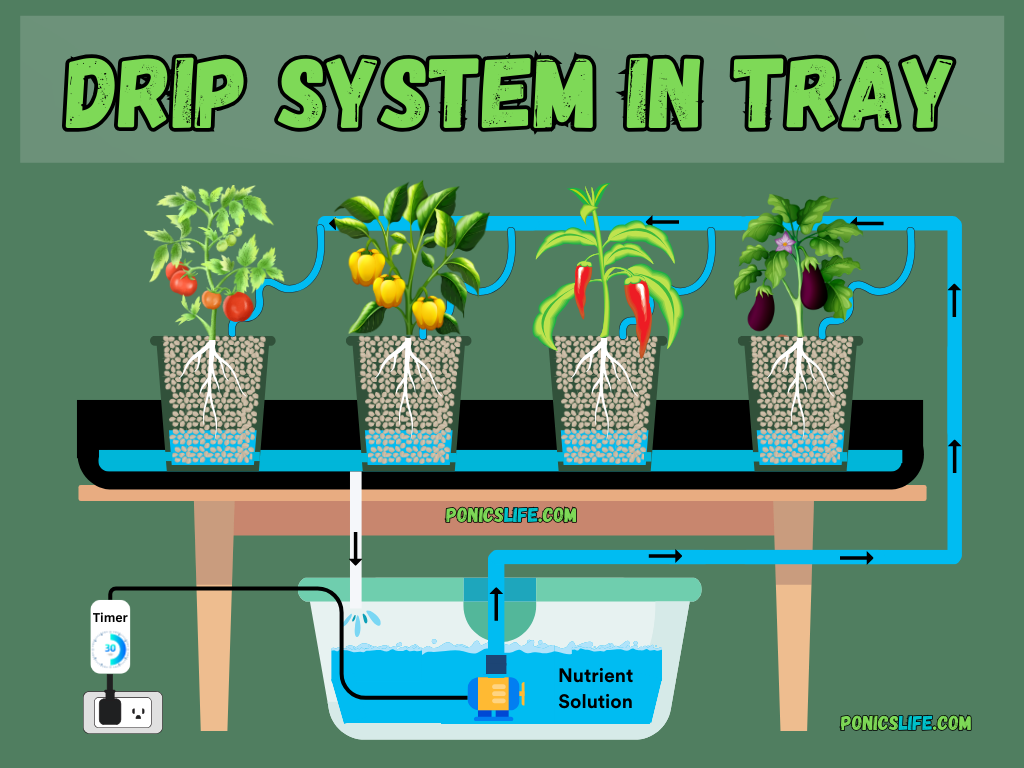
A ‘Drip System’ is one of the six main types of hydroponic systems. It operates on a simple concept: nutrient solution is stored in a reservoir beneath the plants and pumped up to the grow containers, where it drips directly onto the roots. The excess solution either drains back into the reservoir (recovery) or is discarded (non-recovery).
Recovery vs Non-Recovery
As pictured below, a recovery drip system collects and reuses the excess nutrient solution that drains from the plants, circulating it back into the reservoir. In contrast, a non-recovery drip system lets the nutrient solution drain away after use, with no recirculation. While some commercial operations use non-recovery systems for simplicity, most hobbyists prefer recovery drip systems because they conserve water and nutrients.

Drip System Advantages
- Versatility: Drip systems can be customized for almost any plant and space, making them ideal for both hobbyists and commercial setups.
- Efficient Use of Water and Nutrients: In a recovery system, the unused nutrient solution is recirculated, reducing waste and lowering overall water and nutrient costs.
- Supports Larger Plants: Drip systems are particularly effective for growing plants with large root systems, such as tomatoes and cucumbers, which are heavy drinkers and need a higher concentration of nutrients.
- Scalability: Easily scalable from a single bucket to a full commercial setup, allowing for flexibility in how large or small you want to go.
Drip System Disadvantages
- Initial Setup Complexity: Getting started with a drip system can be intimidating due to the number of parts and fittings required.
- Maintenance Required: Drip emitters can sometimes clog since you’re having to move water and nutrients through small tubes.
- Water Quality Concerns: Drip systems can suffer from pH fluctuations and nutrient imbalances if the reservoir isn’t monitored closely.
Drip System Parts
Buckets/Containers: Drip systems typically use 5-gallon buckets, which are great for plants with larger roots like tomatoes. However, you don’t have to use 5-gallon buckets exclusively—smaller containers work too, depending on the plant. Just make sure the containers are food-safe and opaque to prevent algae growth.
Grow Tray: Grow Trays are what’s typically used to collect the runoff from the buckets. And yes, finding a good, affordable grow tray can be tricky, but it’s worth looking online or at local stores. Ideally, you want one that fits the size of your setup and efficiently collects excess water.
Reservoir: The reservoir sits beneath the grow tray and holds the nutrient solution. The size will depend on your system, but for a setup with around 5 buckets, a 20-30 gallon reservoir should be sufficient. Just ensure it’s food-safe and opaque to block light and prevent algae.
Water Pump: Submersible water pumps are what’s going to push your nutrient solution from your reservoir to the drip buckets above it. And depending on the size of your system (i.e. how many buckets you’re using), the size of the pump needed is going to vary. One thing that I recommend is that instead of solely focusing on Gallons Per Hours (GPH), pay attention to head height, which will be listed on the pump and is essentially the ‘height’ at which your pump can move water upwards (this will determine if the water can reach the base of your plants/top of the buckets). Pumps that are somewhere between 200 and 400 GPH should have plenty of head height for a hobby setup.
Grow Media: While you have several options for grow media, the most common choices are clay pebbles and coco coir (or a coco-perlite mix). Regardless of what you go with however, you’ll want to think about the ‘water retentiveness’ of your media. If it holds on to water really well (like coco), then your pump doesn’t need to run as much. If you use something that’s not very absorbent (like clay pebbles) then you’ll want your pump on much longer.
Timer: Timers control when your pump runs. For less absorbent media like clay pebbles, I recommend trying a 30-minute on/30-minute off cycle, or even running it 24/7. For media with higher water retention (like coco), it’s more variable. I’ve had success with running it 20 minutes 3-4 times a day, but you might need to adjust based on your setup. Ultimately, I’d start with what the above, and then make adjustments as you grow to get it right.
Irrigation Lines/Hoses: While you can really use anything for your distribution lines/hoses (such as PVC or a garden hose), I recommend using 1/2-inch or 1/4-inch poly tubing, which is flexible and easy to work with. Both sizes can be found in the irrigation section at your local hardware store and should say ‘poly distribution tubing’ on the side of the tube.
Fittings/Attachments: Fitting and attachments (such as grommets, elbows, T’s, etc.) are often what keeps hobbyists from pursuing drip systems, as the sizing/type/standard is a little intimidating. But going back to what I said above, one of the best ways to overcome this is to simply stick to the irrigation section at your local hardware store, and then start mixing and matching fittings and hoses until you get a snug fit. One thing I like to do is to physically bring whatever hose I’m using (like a little piece of 1/2 inch poly tubing) to the store with me and then test out different connections (because something that says 1/2 inch doesn’t necessarily mean it will 100% fit with something else that’s 1/2 inch).
Drip Emitters: Drip emitter are what’s at the end of the hoses/irrigation lines and regulate the flow of water/nutrients to your plants. Some are adjustable and some are fixed, and you can also poke holes directly into the hoses for a more DIY approach (adjusting the size of the hole will also control the drip rate).
Air Pump and Air Stones (optional): Some hobbyists like to oxygenate their reservoir using an air pump and air stones, however, this isn’t necessarily a must-do. While it certainly won’t hurt anything, in a standard drip system, your plants are receiving most of their oxygen through tiny air gaps in between your grow media. So it’s probably not necessary, but then again, I recommend doing your own trial and error to see if it makes a difference.
Drip System Variations
There are countless ways to design a hydroponic drip system, ranging from simple tray-based setups to more elaborate Dutch bucket systems. Each design has its own benefits and trade-offs, so you can adapt your system to suit your space, plants, and growing goals.
Tray-Based Drip System: This variation involves multiple containers placed within a grow tray. As water and nutrients move down through the buckets, excess water is collected and then drained back down to the reservoir for recirculation.
Dutch Bucket Drip System: Dutch buckets (also called Bato Buckets) are individual growing containers that each have a drainage hole connected to a shared drain line. The nutrient solution is delivered via a drip emitter into each bucket, and excess solution is drained back to the main reservoir for recirculation.

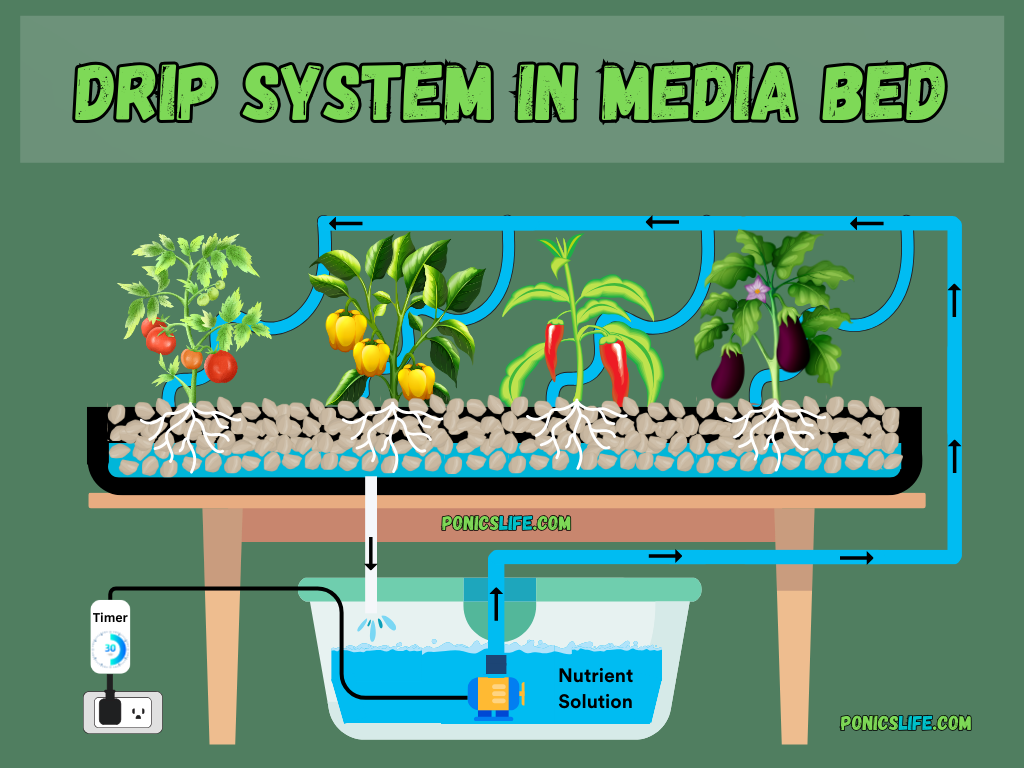
Media Bed Drip System: In this system, plants grow in a large media-filled bed, and nutrient solution is dripped into the media. The media acts as a large holding cell for water, providing water and nutrients between drip cycles.
Tips and Tricks
Drip Rate/Flow: Adjust the flow of your system based on the plants’ needs and your growing media. Plants like tomatoes may need a higher flow rate, while smaller plants may require less.
What Media to Use: Experiment with different grow media to find what works best for you, but make sure you understand how absorbent your media is, as that will impact how often you run the pump.
Bucket Pooling: If you’re using a highly absorbent media like coco, it’s okay to let a little water pool at the bottom of the bucket. An inch or so of water can act as a buffer to keep the roots hydrated and some hobbyists will purposely incorporate this into their design.
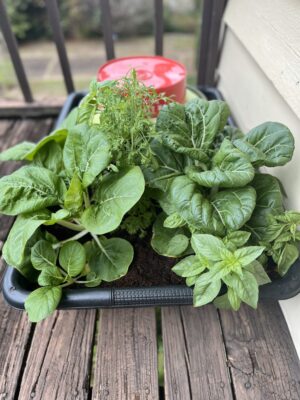
What to Grow: Hydroponic drip systems are perfect for vegetables and fruits with large root systems like tomatoes and cucumbers, but you can grow just about anything. Lettuce, herbs, peppers, basil, cabbage, kale, celery, broccoli, spinach, bok choy, green onions, and collard greens will all do well in a drip system.
Drip Timing: Experiment with your pump’s timer to find the right balance for your plants. If you’re using coco, you can try 20 minutes on 4 or 5 times a day, but don’t hesitate to tweak things as you go.
Trial and Error: As with all hydroponic systems, there’s a bit of trial and error involved in getting everything just right. Be patient and make adjustments as you learn what works best for your setup.
FAQs
1. Can I use PVC fittings for my drip system?
PVC fittings are commonly used in hydroponic systems, but they may come with Proposition 65 warnings regarding potential chemical leaching and/or not be rated for outdoor use under direct sunlight. If this concerns you, opt for materials/fittings made specifically for drip irrigation.
2. How often should I clean my drip system?
Regular cleaning is essential to prevent clogs and nutrient build-up. Aim to clean your reservoir, emitters, and hoses at least once every few weeks.
3. What size pump should I use?
The pump size depends on the number of containers you’re using and their height relative to the reservoir. For a small system with 4-5 buckets, a pump with 200-400 GPH and adequate head height should work fine.
4. Do I need an air pump for my reservoir?
An air pump isn’t necessary, but it can help oxygenate the nutrient solution, especially in larger systems. However, in a typical DIY drip system, your plants receive oxygen through the gaps in the grow media, so adding an air pump is considered optional.
5. What should I do if my drip emitters clog?
Clogs are common in drip systems. To prevent this, use filtered water and clean your emitters regularly. If a clog does occur, you can soak the emitter in vinegar, manually force buildup/debris out of the line, or replace it if cleaning doesn’t work.
6. Is a recovery system better than a non-recovery system?
For hobbyists and small-scale growers, recovery systems are generally more efficient because they conserve water and nutrients. However, non-recovery systems can be simpler to manage in commercial operations where water waste isn’t a significant concern.
7. Where can I learn more about drip systems?
If you’d like to learn more about Hydroponic Drip Systems and everything that’s involved, explore the Hydroponics Hobby Center, or take our online course Hydronics 101: Learn, Design, and Build Your Own System, where I demonstrate the Drip System along with other techniques.
