If you’re looking for a simple, easy way to get started with hydroponics, then Floating Pots might be the perfect solution for you. As a completely passive, hands-off system, Floating Pots require no pumps, no electricity, and minimal effort—making it an ideal option for beginners or anyone seeking a low-maintenance setup.

If you’d like to learn more about basic wick systems, you can check out our Wick System Guide, explore the Hydroponics Hobby Center, or take our online course Off-Grid Hydroponics, where I demonstrate the Floating Pots Method along with other techniques. But let’s get back to the topic at hand!
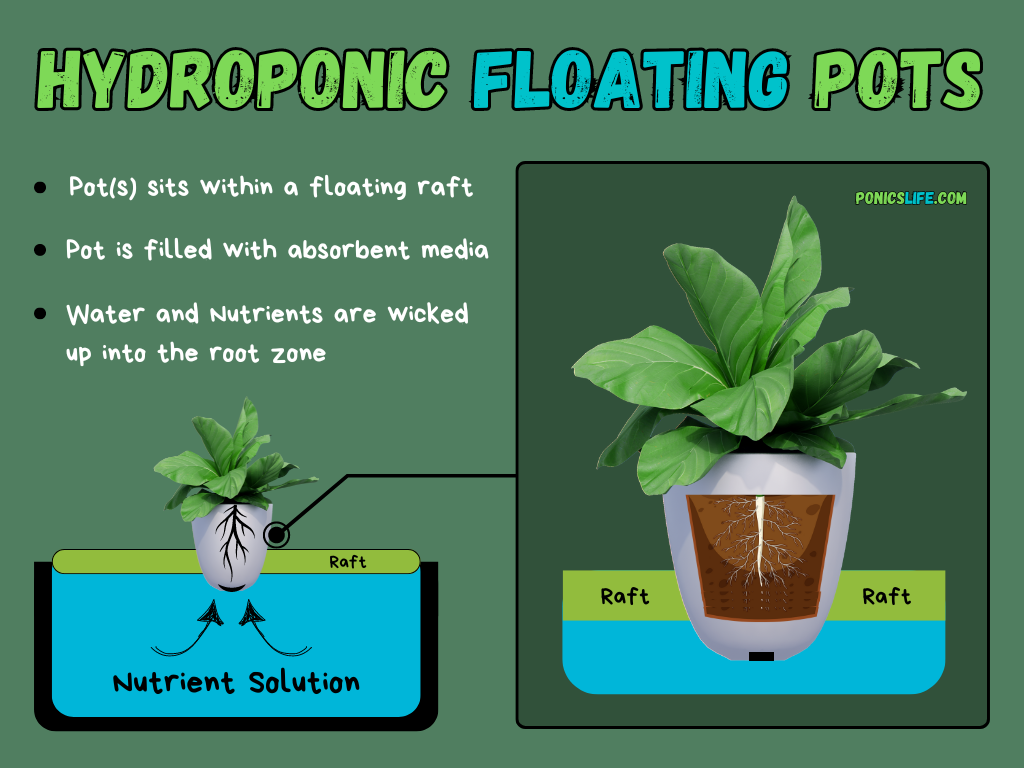
How Floating Pots Work
The science behind floating ‘wicking’ pots is pretty straightforward. Essentially, you’re taking a pot with a drainage hole at the bottom, filling it with an absorbent growing medium (coco coir is my preferred substrate), and placing it into a raft. The bottom quarter (or slightly less) of the pot should be in contact with your nutrient solution. Over time, water and nutrients are absorbed, or ‘wicked up,’ into the rest of the pot. Your plant’s roots then receive water and nutrients from this wicking action, while getting oxygen from the tiny air pockets between the coco coir (or whichever medium you’re using).
My Experience
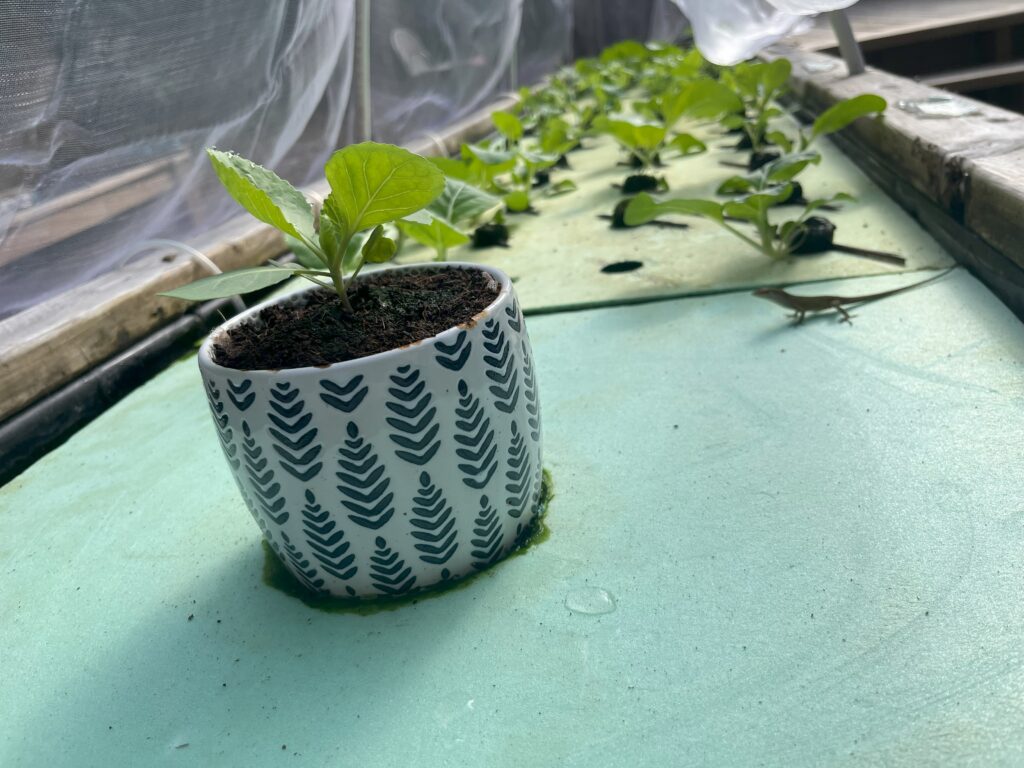
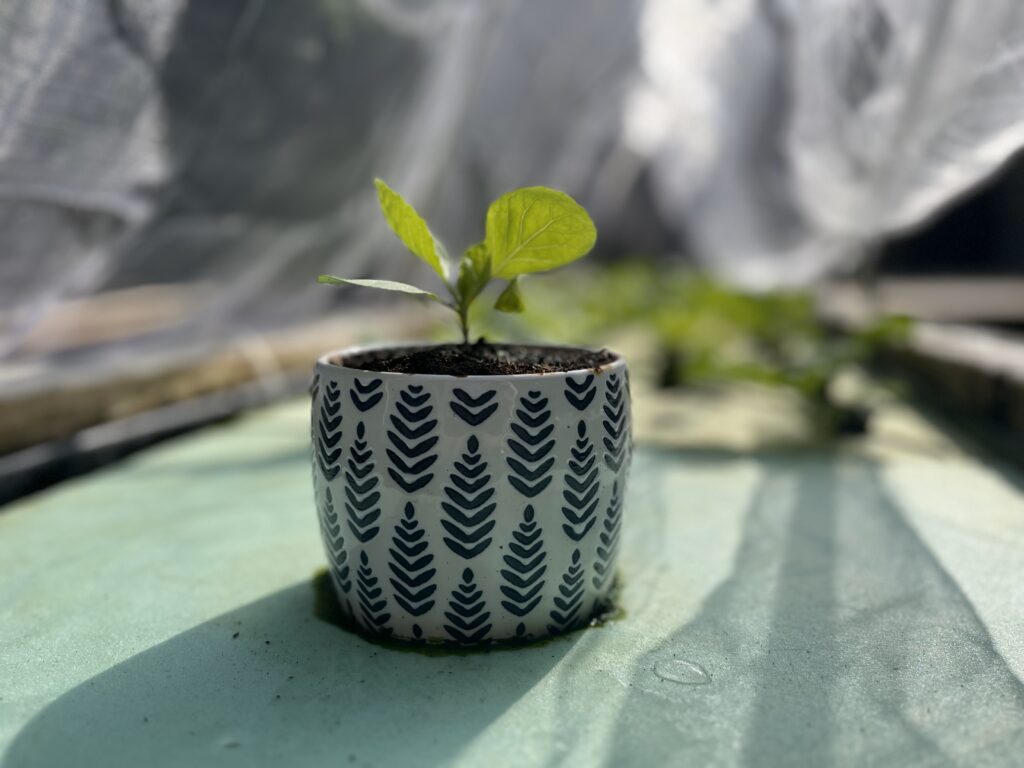
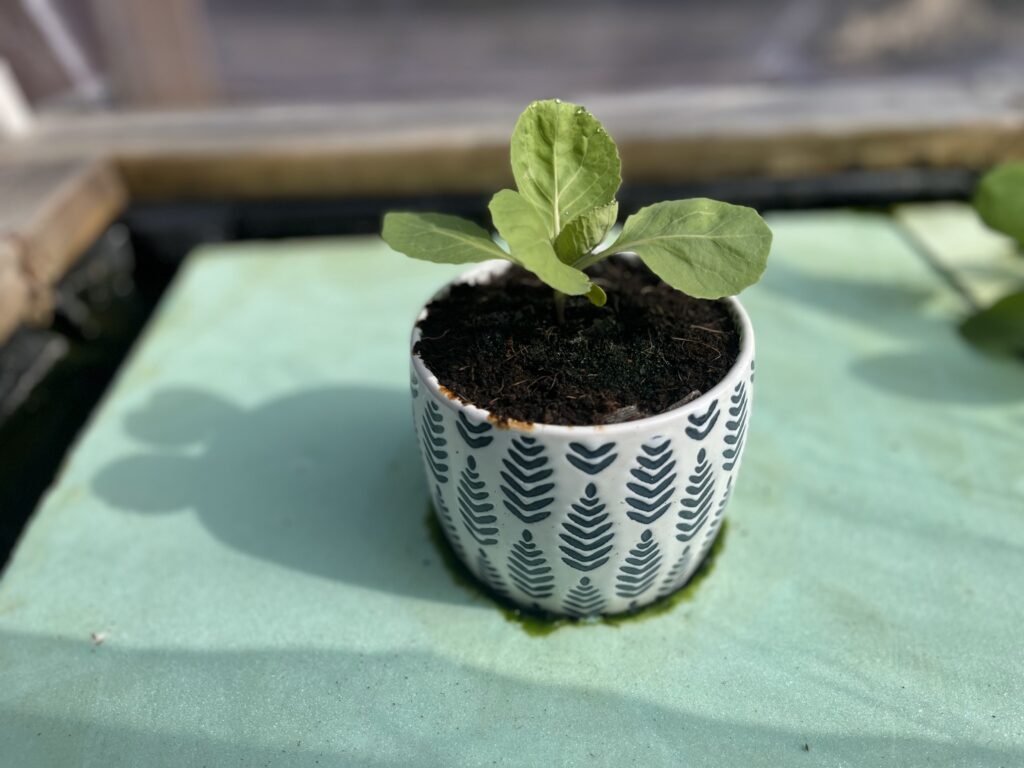
To be honest, this is still a work in progress (and I sense that I’ll do this on a larger scale in the future), but so far, I’m pretty pleased with the results. I placed a single pot in my larger raft system (and no, I did not oxygenate the area beneath the raft, despite what it might look like), and it seems to be doing just as well as the other plants. I can confidently say that setting it up was extremely easy. All I did was transfer a cabbage seedling into the pot, and voilà—it has taken off and is growing just as well (if not better) as the plants next to it in the raft.
Tips and Tricks
Use a Food Safe Paint Strainer: Line the pot with a food-safe paint strainer (or something similar) to prevent your growing medium from falling through the drainage hole at the bottom.
Choose a Ceramic or Plastic Pot with a Trapezoidal Shape: This shape helps stabilize the pot in the raft and improves overall water contact.
Absorbent Media is Key: Coco coir or similar highly absorbent growing media will help ensure the nutrients are wicked up effectively.
Position the Pot Correctly: Make sure the pot is placed so that about a quarter of it is submerged in the nutrient solution. Too much water contact can drown the roots; too little will limit nutrient uptake.

The Raft Does Double Duty: Not only does the raft hold the pots in place, but it also acts as a lid to prevent algae growth on the nutrient solution.
Be Mindful of Weight: A 2×2 raft can typically support around 4 to 6 pots filled with growing media, but remember that as your plants grow, they’ll get heavier, so ensure your raft is sturdy enough to support them.
How to Build Your Own
Here’s how you can build your own ‘Floating Pots’ hydroponic wick system in just a few steps. The materials are relatively simple, and the setup is easy to replicate at home. Let’s get started!
Step 1: Gather Your Materials
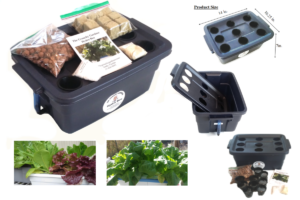
To build your Floating Pot Hydroponic system, you’ll need the following items:
- Extruded Polystyrene Foam Boards: These are often sold as ‘project boards’ at hardware stores. They’ll serve as the raft that holds your pots and floats on the nutrient solution.
- Food-Safe Paint Strainers: Use these (or something similar) to line your pots and prevent the growing medium from falling through the drainage hole.
- A Small Pot: The pot can be plastic or ceramic but must have a drainage hole at the bottom. Pots with a trapezoidal shape work best for stability.
- Coco Coir or Other Absorbent Growing Medium: This will fill the pots and wick up the nutrients to the plant roots.
- Nutrient Solution: You’ll need a standard hydroponic nutrient solution to feed your plants.
- A Container or Tank: This will hold the nutrient solution and the floating raft and can just be a regular plastic tote or something similar. Make sure that it’s food safe, opaque (so light can’t penetrate it and cause algae), and that it’s deep enough so the raft floats without touching the bottom.
Step 2: Prepare the Raft
- Measure and cut the extruded polystyrene foam board to fit the surface area of your container or tank. The raft should sit comfortably on top of the nutrient solution without getting stuck on the edges.
- Using a marker, trace the bottom of your pots onto the foam board where you want them placed.
- Cut out the circles or holes where the pots will sit. The holes should be large enough for the bottom of the pots to fit through, but small enough so that the pots don’t fall all the way through.
Step 3: Assemble the System
- Line the inside of each pot with a food-safe paint strainer (or something similar) to prevent your growing medium from falling through the drainage hole.
- Fill each pot with coco coir (or your chosen absorbent medium) and place the pots into the holes you cut in the raft. Ensure that about one-quarter of each pot will be submerged in the nutrient solution once the raft is placed on the container.
- Fill your container with the nutrient solution, then carefully place the raft with the pots on top of the solution, ensuring the bottoms of the pots are partially submerged.
Step 4: Add Your Plants
- If you’re starting from seedlings, simply transfer them into the pots filled with coco coir.
- If you’re starting from seeds, plant them directly in the growing medium. Keep the surface of the medium moist until the seeds germinate.
Step 5: Monitor and Maintain
- Ensure that the nutrient solution level remains high enough for the pots to stay partially submerged. You may need to add more solution over time as the plants absorb it and water evaporates.
- Check your plants regularly for growth, and replenish the nutrient solution as needed.
Step 6: Enjoy the Growth!
With your Floating Pot system in place, you now have a low-maintenance, passive hydroponic setup that can keep your plants growing with minimal intervention.
FAQs
1. What types of plants can I grow in a Floating Pot Hydroponics system?
Floating Pots work best with plants that thrive in consistently moist conditions. Leafy greens like lettuce, spinach, and herbs (such as basil and mint) are ideal. You can also grow some small fruiting plants, like strawberries, but be cautious of larger, heavier plants as they might require additional support for the raft.
2. How often do I need to refill the nutrient solution?
The frequency of refilling the nutrient solution depends on your climate and the size of your reservoir. In hotter conditions, you may need to top it up more frequently due to evaporation. As a general rule, check the solution level every few days and add more as needed to ensure the bottom of the pots remains in contact with the water.
3. Do I need to oxygenate the water in a Floating Pot system?
No, oxygenation isn’t necessary with a Floating Pot system. The wicking action of the growing medium provides adequate water and nutrients, while the air pockets in the medium provide oxygen to the plant roots. This passive setup is designed to eliminate the need for additional pumps or air stones.
4. Can I use other growing media besides coco coir?
Yes! While coco coir is highly absorbent and ideal for wicking systems, you can also experiment with other media like perlite, vermiculite, or even peat moss. Just ensure that whatever you use is lightweight and retains water well to promote efficient nutrient uptake.
5. Is algae a problem in the Floating Pot system, and how do I prevent it?
Algae can grow in the system if the nutrient solution is exposed to light. The raft acts as a natural barrier, helping to block light and prevent algae growth. To further reduce the chance of algae, ensure the raft covers most of the water’s surface and avoid exposing the nutrient solution to direct sunlight.
5. Where can I learn more about ‘off-grid’ passive hydroponic systems like this one?
If you’re interested in learning more about passive hydroponic systems like Floating Pots, as well as off-grid setups, check out our online course Off-Grid Hydroponics. The course includes hands-on demonstrations of various methods, including Floating Pots (and the Candlestick Method), and provides detailed instructions on creating your own systems.